Black Mold Cleanup: The Step-by-Step Protocol I Wish I'd Had

Black mold cleanup is not the same job as spraying a stain and wiping it. It is a sequence — stop the water, isolate the area, protect yourself, take out what cannot be saved, clean what can, and then prove to yourself the problem is gone — and the order matters more than any product you buy. I learned that the expensive way in a 1990s bathroom where I "cleaned" the same patch four times before I understood that the leak behind the tub surround was refilling it. This page is the checklist I now hand to friends. It follows the U.S. EPA's cleanup guidance (read September 2026) step for step, and it tells you exactly where the line is between a Saturday job and a call to a certified contractor.
From Sukie's experience
The first time I did a proper cleanup — the basement, not the bathroom — I skipped containment because the mold was "only" along one baseboard. Two weeks later I found new speckling on a cardboard box on the opposite wall, downwind of where I had been scrubbing. Since then I hang the plastic even for a small job. It takes ten minutes and it is the step people skip most.
First, decide whether this is your job at all
The EPA draws the line at about 10 square feet — "less than roughly a 3 ft. by 3 ft. patch" — and says that below that size, "in most cases, you can handle the job yourself." Above it, the same guidance points you to a contractor with mold experience. That threshold is the single most useful number in this whole subject, so measure before you do anything else. Pace it out on the wall or floor; a standard sheet of drywall is 4 by 8 feet, so a 10-square-foot patch is roughly a third of one sheet.
Size is not the only trigger for calling in help. The EPA is explicit that if the water damage "was caused by sewage or other contaminated water, then call in a professional who has experience cleaning and fixing buildings damaged by contaminated water," and that if you suspect the heating and cooling system is involved you should not run it and should follow their commercial-building guide instead. Add one more from me: if anyone in the house has asthma, a compromised immune system, or is an infant, treat the threshold as lower and get the vulnerable person out of the house during the work. The EPA's own advice is to "consult a health professional before starting cleanup" if you have health concerns.
If you are above the line, stop here and read what a professional remediation actually involves and what it costs. If you are below it, keep going — the rest of this page is for you.
Step 1 — Find and stop the water (nothing else works until you do)
Every cleanup guide says this and every homeowner skips it, including me. The EPA's wording is blunt: "If you clean up the mold, but don't fix the water problem, then, most likely, the mold problem will come back." Mold is a symptom. The disease is moisture.
How to find the source in an afternoon
- Look at the shape of the stain. A sharp horizontal line marks a flood or a leak that pooled; a fan shape spreading down from a corner is a roof or window leak; a band along the baseboard is wicking from below or condensation on a cold wall.
- Check the obvious three: the nearest plumbing (under sinks, behind toilets, around tub surrounds), the nearest exterior penetration (windows, doors, vents), and the nearest downspout or grade outside that wall.
- Press the surface. Drywall that has been wet for weeks gives under a thumb. Note where it stops being soft — that is your moisture boundary.
- Buy or borrow a pin moisture meter. They are inexpensive and they turn guessing into numbers. Read a dry wall elsewhere in the house first so you know what "normal" reads.
The EPA also gives a time limit that explains why some people get mold after a single incident and others don't: "It is important to dry water-damaged areas and items within 24-48 hours to prevent mold growth." If your source was a one-off — a burst hose, an overflowing tub — and you dried it inside that window, you may not need much of what follows. If it has been wet for weeks, assume the material is compromised.
Not sure if it's a DIY job or a pro job?
Get a ballpark price first, then decide.
Estimate my removal cost →Step 2 — Contain the work area
Containment is the step that separates a cleanup from a spore-spreading exercise. Disturbed mold releases spores; without a barrier those spores travel on air currents to every soft surface in the house. For small jobs the EPA's commercial guidance calls for no formal containment, but the mechanics of what it prescribes for mid-sized jobs — a single layer of 6-mil polyethylene sheeting, vents and doors sealed, air pulled out of the room rather than in — are cheap enough that I do a light version every time.
- Close the room's door and tape a sheet of 6-mil plastic over it, or over the opening if there is no door. Slit it for entry and overlap the flap.
- Tape plastic over supply and return air vents in the room. Turn the HVAC system off for the duration — the EPA says not to run it if you "know or suspect that it is contaminated with mold," and a room you are actively scrubbing qualifies.
- Open a window and put a box fan in it blowing out. That creates mild negative pressure so air leaks in under the door rather than out into the hallway. Do not point a fan at the mold.
- Move soft furnishings, clothing and paper out before you start, or bag them. Anything that stays gets covered.
If you cannot achieve this — the mold is in a hallway with no door, or in an open-plan basement — that is a sign the job is bigger than it looks, and it belongs in the mid-sized tier where the EPA leaves the decision to "professional judgment."
Step 3 — Protect yourself before you touch anything
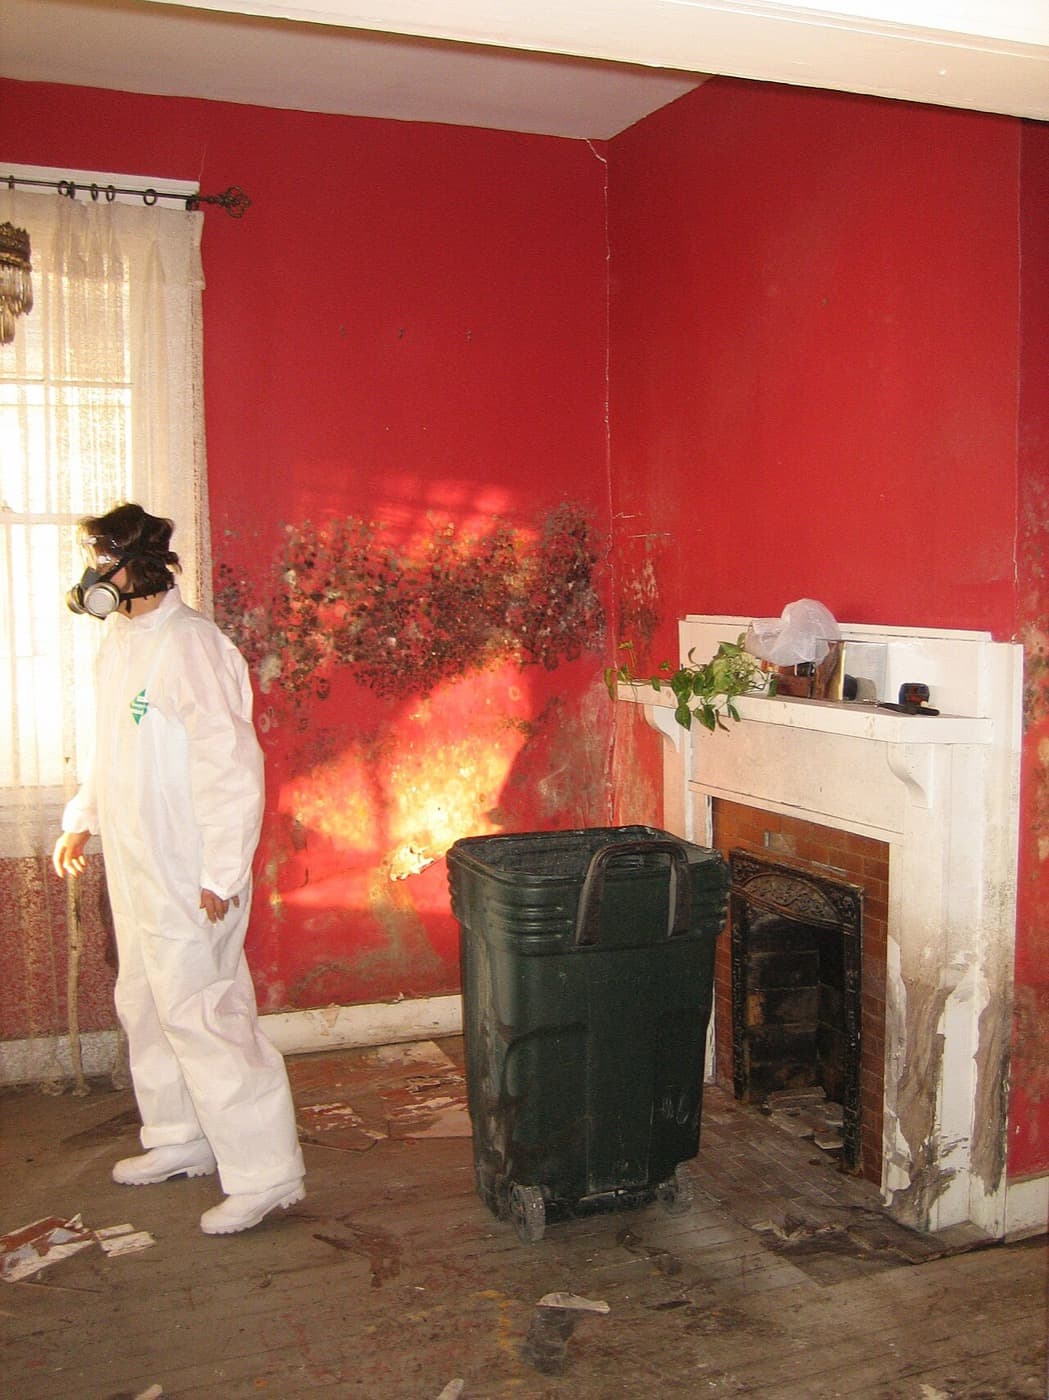
The EPA's minimum kit is three items and none of them is optional: an N-95 respirator, gloves, and goggles — specifically "goggles that do not have ventilation holes." The N-95 filters at least 95% of airborne particles when it seals to your face; a surgical mask or a bandana filters almost nothing that matters. If you have a beard, an N-95 will not seal and you should either shave the seal area or step up to a half-face air-purifying respirator with a HEPA filter cartridge, which is what the EPA lists as the next tier ("limited PPE") for mid-sized jobs.
Wear long sleeves and long trousers you can wash hot or throw away; the CDC's cleanup advice adds rubber boots and rubber gloves. Put the respirator on before you enter the contained area and take it off after you leave it. That sounds obvious and I still catch people pulling their mask down inside the room to talk.
Step 4 — Sort materials: what gets cleaned, what gets bagged
This is the decision that determines how much of the job is scrubbing and how much is demolition, and it comes down to one property of the material: whether it is porous. The EPA says "absorbent or porous materials, such as ceiling tiles and carpet, may have to be thrown away if they become moldy," because mold grows into the pores and cannot be reliably cleaned out. Hard, non-porous surfaces can be cleaned. The research backs this split: a 2015 review in the International Journal of Environmental Research and Public Health summarised earlier work showing that common antifungals inhibited growth on pine blocks within 12 hours — but once rinsed, the spores recovered and growth was "entirely uninhibited" two weeks later, leading the authors to conclude that most antifungals "are effective on hard non-porous surfaces but viable spores within porous surfaces may be unaffected."
| Material | Porous? | What to do |
|---|---|---|
| Tile, glass, metal, sealed countertop, hard plastic | No | Clean and dry |
| Painted drywall, surface growth only, not soft | Semi | Clean, dry, monitor; replace if it returns or the paper face is stained through |
| Drywall that is soft, sagging or stained through | Yes | Cut out 12 in. past the visible growth and bag |
| Unfinished wood framing, surface growth | Semi | Clean, dry thoroughly, HEPA-vacuum; wood usually stays |
| Carpet, pad, ceiling tiles, insulation, upholstery | Yes | Bag and dispose |
| Books, cardboard, paper | Yes | Dispose unless irreplaceable — then freeze and consult a conservator |
When you cut drywall, cut a clean rectangle at least a foot beyond the last visible growth, because the growth you can see is rarely the edge of the growth that exists. Score the paper, snap the section, and put it straight into a bag inside the containment. Do not carry loose moldy drywall through the house.
Step 5 — Bag, seal, and dispose
Everything that leaves the contained area moldy should leave in a sealed bag. Use heavy contractor bags (3-mil or thicker), fill them no more than two-thirds, twist the neck, tape it, and then put the bag inside a second bag before it crosses the plastic. Wipe the outside of the outer bag with a damp cloth as it passes through the flap. This is the same double-bag principle the EPA describes for full containment on large jobs, scaled down.
The EPA's guidance describes bagging and removing moldy material; it does not prescribe a special waste stream for a small home cleanup, and sealed bags from my own jobs went out with the household trash. Check your municipality's bulk-waste rules for drywall and carpet, which some transfer stations charge for by weight. If a remediation company is doing the work, disposal is part of the quote; if you are doing it, budget a truck trip.
Step 6 — Clean what stays
Now, and only now, the part everyone starts with black mold cleanup at: the actual cleaning. The order is: vacuum, wash, rinse, dry.
- HEPA-vacuum every surface in the containment — walls, studs, floor, the plastic itself. A vacuum without a HEPA filter blows fine spores straight through the bag and back into the air, so borrow or rent one if you do not own one. The EPA's commercial guide places HEPA vacuuming after materials are thoroughly dry and contaminated materials are removed; do it before the wet clean too, because dry spores are easier to capture than wet ones.
- Wash with detergent and water. The CDC's current guidance is that mold "can be removed from hard surfaces with household products, soap and water, or a bleach solution of no more than 1 cup of household laundry bleach in 1 gallon of water." Note what comes first in that sentence. Detergent and physical scrubbing remove the growth; that is the actual work.
- Use bleach only if you have decided to, and never routinely. The EPA states that "the use of a chemical or biocide that kills organisms such as mold (chlorine bleach, for example) is not recommended as a routine practice during mold cleanup." If you use it, stay at or below the CDC's 1-cup-per-gallon ratio, open the windows, and — in the CDC's words — "never mix bleach with ammonia or other cleaners. This will produce a poisonous gas." I cover the bleach question in full in does bleach kill black mold.
- Rinse with clean water and dry aggressively. Fans, a dehumidifier, and time. Wood framing should read dry on the meter before anything is closed back up; on my basement job that took four days with a dehumidifier running.
- HEPA-vacuum again once dry. Then wipe the plastic, fold it inward, bag it, and take the containment down.
Skip the temptation to fog, ozone, or "treat" the room with a product afterwards. The EPA's position is that "it is impossible to get rid of all mold and mold spores indoors"; a background level "roughly equivalent to or lower than the level in outside air" is the realistic end state, and you get there by removing growth and controlling moisture, not by adding chemicals.
Step 7 — Verify before you rebuild
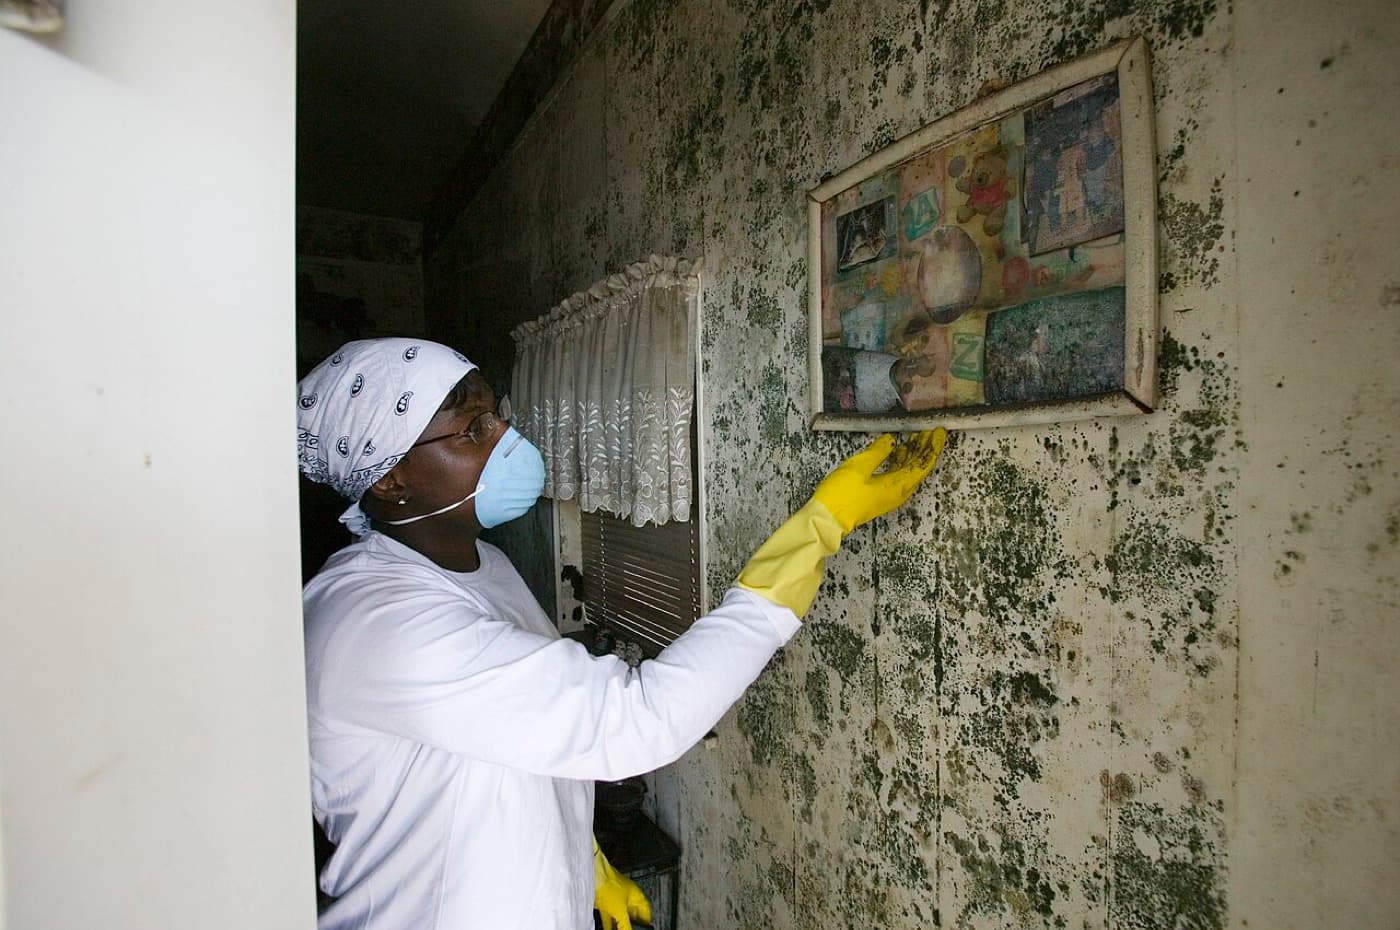
Black mold cleanup is not done when the wall looks clean. The EPA's completion test for a remediation is practical rather than laboratory-based: no visible mold, no moldy odors, the moisture problem resolved, and the people using the space not reporting symptoms. Apply that to your own job before you hang new drywall.
- Wait a week with the area open and the dehumidifier running. If growth reappears on cleaned wood, the wood was not dry or the water is still coming in.
- Meter the framing and the subfloor. Compare to your baseline reading from an unaffected wall.
- Smell it. A musty smell after a week of drying means there is growth you have not found — often on the back of drywall you decided to keep. I explain what that smell tells you in black mold smell.
- Do not paint or caulk over anything questionable. The EPA: "Do not paint or caulk moldy surfaces. Clean up the mold and dry the surfaces before painting."
And no, you do not need to test. The CDC "does not recommend mold testing" for homes, and the EPA says that "in most cases, if visible mold growth is present, sampling is unnecessary." A clearance test makes sense after a professional remediation because it is how you hold the contractor to a result; for a 9-square-foot bathroom patch it tells you nothing the smell test doesn't.
Step 8 — Rebuild with moisture in mind
Rebuilding is your chance to make the same spot harder to colonise next time. Use mold-resistant (paper-free or treated) drywall in bathrooms and basements. Prime with a primer that carries a mildewcide — the CDC lists adding mold inhibitors to paint among its prevention steps. Leave a small gap between the bottom of new drywall and a concrete floor so it cannot wick. Re-caulk tub surrounds and window sills properly, because a failed caulk joint is how my bathroom got wet in the first place.
Then attack the humidity that made the room hospitable. The CDC's target is to keep indoor humidity "no higher than 50% — all day long," using air conditioning or a dehumidifier, with kitchen and bathroom exhaust fans vented to the outside. If the room does not have an exhaust fan, that is the single highest-value upgrade on this list. I go through the full prevention routine in how to prevent black mold.
The whole checklist on one screen
Print this or screenshot it. Everything above, in order, with the go/no-go in the first line.
- Measure the growth. Over ~10 sq ft, sewage/flood water, HVAC involvement, or a vulnerable occupant → hire a certified contractor.
- Find and stop the water. Meter the wall. Note the dry boundary.
- Move or bag soft items. Seal the door and vents with 6-mil plastic. Fan blowing out of a window. HVAC off.
- N-95 (or half-face P100), gloves, goggles without vents, washable or disposable clothing, boots.
- Sort: non-porous stays, porous goes. Cut drywall 12 in. past visible growth.
- Double-bag debris inside the containment. Wipe bags on the way out.
- HEPA-vacuum → detergent wash → optional CDC-ratio bleach on hard surfaces only, never mixed → rinse → dry to meter → HEPA again.
- Take down containment inward. Bag the plastic.
- Wait a week open. Meter, look, smell. No paint over doubt.
- Rebuild with mold-resistant board and primer, exhaust fan, humidity under 50%.
What black mold cleanup costs if you don't do it yourself
For scale, and so you can judge a quote: HomeGuide's February 2026 cost survey puts professional remediation at $15 to $30 per square foot, with small jobs of 10 to 100 square feet at $500 to $1,500 and medium jobs of 100 to 300 square feet at $1,500 to $6,000. This Old House's March 2026 figures are similar — a typical range of $1,200 to $3,750 and an average of $2,300. A bathroom-sized problem sits at the bottom of both ranges; a full basement or attic can reach $6,000 to $15,000 on HomeGuide's numbers. If your job is under the 10-square-foot line, your realistic outlay is a respirator, plastic, bags, a rental HEPA vacuum and a weekend. Use the cost calculator to put a number on your own room, and read the full cost guide for what drives quotes up or down.
Where this page fits
This is the cleanup protocol — the order of operations. For the surface-by-surface methods (what to actually use on drywall versus wood versus tile), go to how to remove black mold, which is the hub for this whole section, or straight to how to get rid of black mold for the room-by-room version. If your question is really "is this even mold, and is it the dangerous kind?", start at black mold identification instead. And if you are still not sure whether to do it yourself, the honest answer is in the first section: measure it. Everything else on Black Mold Removal Hub follows from that number.
Get a realistic price before you call anyone
Use our free Black Mold Removal Cost Estimator to get a tailored price range for your room, size, and severity — built from current national and regional pricing data. Then you'll know whether a contractor quote is fair before you commit.
Open the Cost Estimator →Frequently asked questions
How long does black mold cleanup take?
Can I stay in the house during cleanup?
Do I need to test after black mold cleanup?
Is black mold cleanup debris hazardous waste?
Should I use bleach for black mold cleanup?
Sources
- U.S. EPA — A Brief Guide to Mold, Moisture and Your Home (read September 2026)
- U.S. EPA — Mold Cleanup in Your Home (read September 2026)
- U.S. EPA — Mold Remediation in Schools and Commercial Buildings, Chapter 3 (containment and PPE definitions)
- CDC — Mold: About (read September 2026)
- Rogawansamy et al., Int J Environ Res Public Health 2015;12(6):6319 — antifungal agents on porous vs non-porous surfaces
- HomeGuide — Mold Removal Cost (February 2026)
- This Old House — Mold Remediation Cost (March 2026)