Black Mold Behind Drywall: How to Detect It and Decide What to Cut

Black mold behind drywall is the kind of problem you usually smell or suspect before you ever see it — and that is exactly what makes it tricky. Drywall (gypsum board with a paper facing) is a buffet for mold once it gets wet: the paper is organic, it holds water, and the back of the sheet faces a dark, still wall cavity with zero airflow. By the time staining bleeds through to the painted side, the hidden face is often far worse.
This guide is about the two questions that actually matter for hidden wall mold: how do you confirm it is there without tearing your house apart, and once you find it, do you cut the drywall out or can you clean and save it? I learned this firsthand when a slow leak behind a tub surround rotted the wall in my old bathroom — the painted side looked fine for weeks while the cavity behind it was a mess.
From Sukie's experience
In my 1990s bathroom, the only early clue was a faint musty smell near the tub and a single soft spot in the paint. When I finally cut a test hole low on the wall, the back of the drywall and the bottom plate behind it were black — the leak had been wicking up for over a month.
How mold ends up behind the drywall
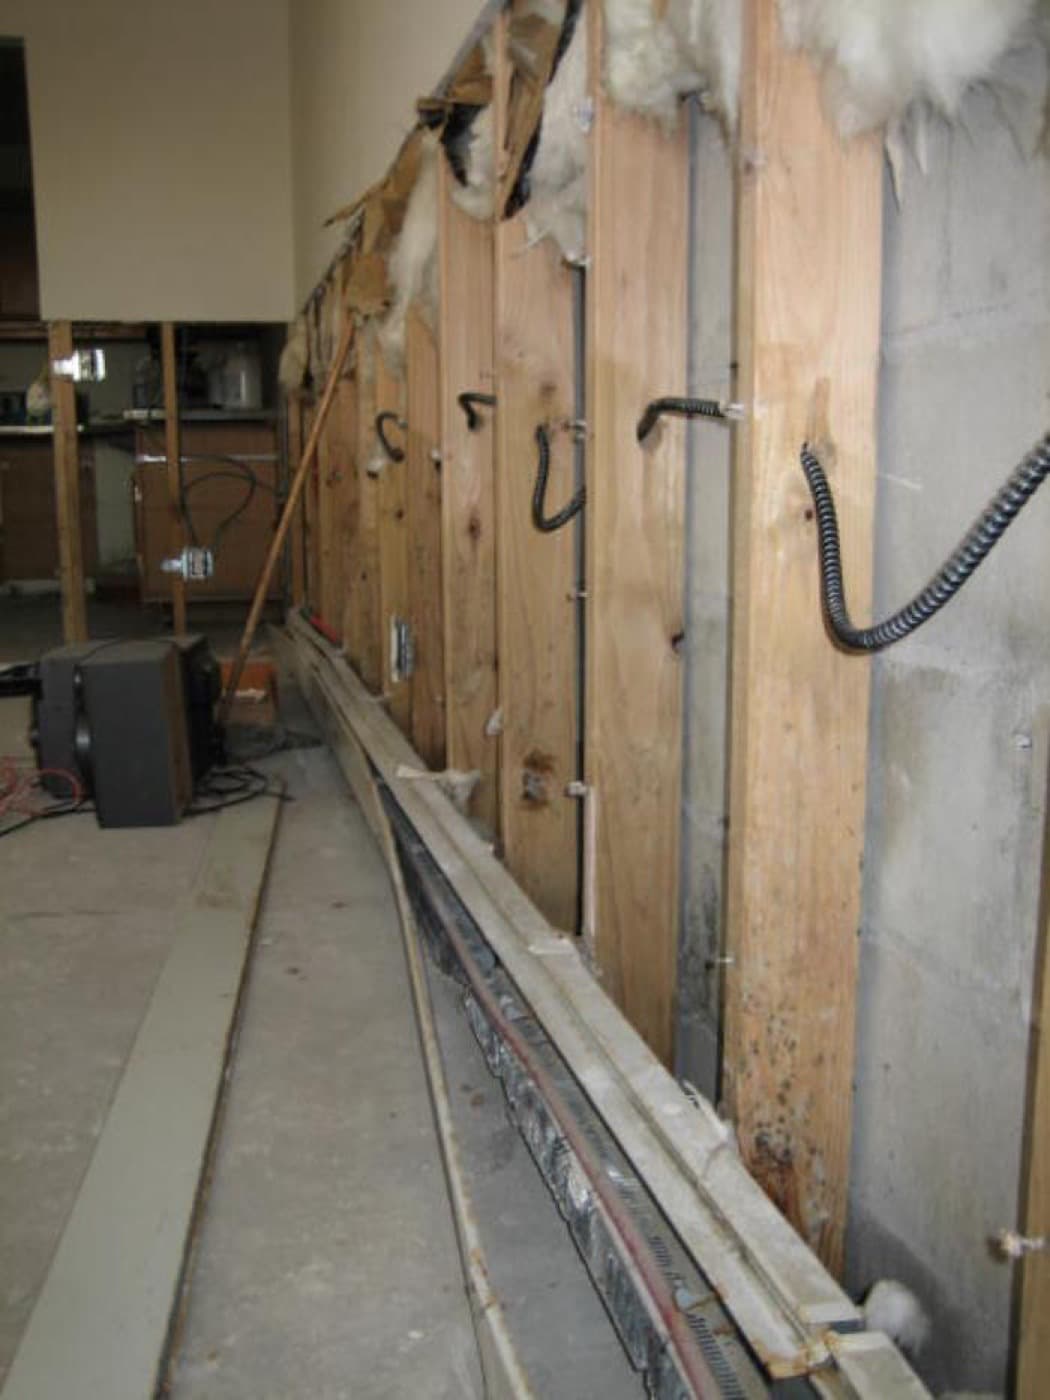
Hidden wall mold almost always traces to water that got into the cavity and could not dry. The usual sources: a plumbing leak inside the wall (supply line, drain, or a shower/tub valve), a roof or window leak running down inside the framing, a flooded floor that wicked up into the bottom of the sheet, or chronic condensation on a cold exterior wall. Because the cavity has no airflow, even a modest amount of trapped water keeps the gypsum and paper damp for weeks — long enough for a colony to establish on the back face you cannot see.
How to check without wrecking the wall
You can confirm hidden mold with surprisingly little destruction. Start non-invasive, then escalate only if needed:
- Moisture meter. Run a pinless meter across the suspect wall and a known-dry wall for comparison. Elevated readings tell you water is present even if you see nothing.
- Inspection-camera test hole. Drill a small hole (the size of a borescope tip) in an inconspicuous low spot and look inside. This is the cleanest way to confirm before opening anything up.
- Remove an outlet/switch cover. Kill the breaker first, then peek into the cavity around the electrical box.
- Cut a small inspection square. A 6-inch square low on the wall lets you see and smell the back of the sheet directly.
Wear an N95, gloves, and eye protection the moment you open anything, because cutting into a moldy cavity releases spores. The EPA's mold cleanup guidance recommends professional help and proper containment when mold is hidden behind walls or covers a large area.
Cut it out or treat and save it?
This is the decision everyone wants a clear answer to. The honest rule of thumb: if the paper facing of the drywall is moldy, the sheet usually has to go. Mold roots into the paper and gypsum core, and you cannot reliably clean it out — surface-cleaning the front while the back is colonized just buys you a relapse. Drywall is cheap; redoing the whole job is not. Here is how I think about it:
| Situation | Cut out | Treat & save |
|---|---|---|
| Mold on the back paper / inside the cavity | Yes | No |
| Drywall soft, swollen, or crumbling | Yes | No |
| Surface mildew on paint, sheet still solid and dry behind | No | Yes |
| Affected area larger than ~10 sq ft | Pro | Pro |
| Sewage or flood water involved | Pro | Pro |
For purely surface staining on otherwise sound, dry drywall, you can often clean and repaint — see how to clean mold off walls before painting. When the sheet itself is compromised, our how to remove black mold from drywall guide covers the cut-and-replace process in detail.
How to cut out moldy drywall safely
If the verdict is removal, contain the work so you do not contaminate the rest of the house:
- Fix the water first. Stop the leak and let the cavity dry; replacing drywall over a wet wall just restarts the clock.
- Seal the room. Close doors, tape plastic over vents, and run a fan venting out a window.
- Score and cut the drywall a few inches beyond the visible damage, cutting along studs so you have a clean edge to patch.
- Bag it immediately. Place moldy pieces in plastic bags inside the room and seal before carrying them out.
- Inspect the cavity. Check the studs, bottom plate, and insulation — wet, moldy fiberglass insulation should be discarded, and the framing may need treatment.
- Dry, then treat the framing before closing the wall back up.
Don't forget what's behind the drywall
Once the wall is open, the studs and bottom plate are the next thing to evaluate. Solid framing lumber is often salvageable — you can clean and treat it rather than replace it — but soft, rotted wood needs to come out. Because that is a whole topic of its own, see black mold on wood studs for how to decide whether to treat or replace the framing before you re-sheet the wall.
Why the back of the sheet is always worse than the front
One thing trips people up over and over: the painted side looks like a minor stain, so they assume it is a minor problem. With drywall, the opposite is almost always true. Water in a wall cavity reaches the back paper facing first, sits against it in still, dark conditions, and colonizes there long before enough moisture and staining migrate through the gypsum to show on the finished side. By the time you see a fist-sized stain on your paint, the back of that sheet can be black across a much larger area. This is exactly why surface-cleaning and repainting drywall that is moldy on the back is a losing game — you are treating the small visible symptom while the real colony thrives an eighth of an inch away on a surface you never touched. It is also why, once you confirm cavity mold, removal beats treatment for the sheet itself.
Patching the wall back up the right way
Once the moldy drywall is out, the framing is checked, and everything reads dry on a moisture meter, you can close the wall back up — but do it in a way that does not set up a repeat. Use new drywall (mold-resistant 'green' or 'purple' board is a smart upgrade in bathrooms, kitchens, and below-grade walls where moisture risk is higher). Make sure any insulation you put back is dry and clean. Tape, mud, and prime as usual, and consider a mold-resistant primer on the new sheet in damp-prone rooms. The single most important thing, though, is sequencing: never hang new drywall over a wall that is still damp or whose leak has not been fixed. New board over a wet cavity simply restarts the entire process behind a fresh coat of paint, and you will be cutting it open again within months. Confirm the repair held by checking the area over the following weeks for any returning smell, staining, or elevated moisture readings.
When to bring in a professional
Hidden mold is one of the situations where calling a pro is often the smart move from the start, not a last resort. Get professional help if the affected area is larger than about 10 square feet, if the moisture came from sewage or flooding, if mold has reached the framing or subfloor over a wide area, or if anyone in the home has asthma, allergies, or a compromised immune system. A remediation contractor can set up containment, find the full extent with proper tools, and document the work — useful if you are filing an insurance claim. Our professional mold remediation process page walks through what to expect, and black mold removal cost covers pricing.
Get a realistic price before you call anyone
Use our free Black Mold Removal Cost Estimator to get a tailored price range for your room, size, and severity — built from current national and regional pricing data. Then you'll know whether a contractor quote is fair before you commit.
Open the Cost Estimator →